Integrating Hacked Touch Panel into Home Assistant
 Written by
Lucas Teske
Written by
Lucas Teske
on
Integrating Hacked Touch Panel into Home Assistant
In the previous article I showed a simple hack of a chinese Touch Panel. Now I have successfully integrated it Home Assistant and I’m able to turn my room light on / off. Here is how.
From now on I will assume you have ESPHome working on your machine and Home Assistant configured. ESPHome is very easy to install if you have python pip:
pip install esphome
Should install everything you need.
First let’s create our project. I will call it touchpanel.yml:
esphome:
  # Change it for any name you want. This is what Home Assistant will show
  name: lucasslider
  platform: ESP8266
  board: nodemcuv2
  includes:
    - touchpanel.h
    - wtc801.h
    - wtc801.cpp

wifi:
  # Change to your wifi configuration
  ssid: "MyWifiSSID"
  password: "MyWifiPassword"

  # Enable fallback hotspot (captive portal) in case wifi connection fails
  ap:
    ssid: "Lucas Slider Fallback Hotspot"
    password: "1234567890"

captive_portal:

# Enable logging
logger:

# Enable Home Assistant API
api:
  # Home Assistant will ask this password when configuring the device
  password: "MySecretAPIPass"

ota:
  # ESPHome will ask this password for reprogramming the ESP8266 Over-The-Air
  password: "MySecretAPIPass"

# Empty just to include Binary Sensor Library
binary_sensor:

# Empty just to include Sensor Library
sensor:

# Our Custom Component
custom_component:
  lambda: |-
    auto touchpanel = new TouchPanel();
    App.register_component(touchpanel);
    App.register_binary_sensor(touchpanel->leftButton);
    // Change for the name you want
    touchpanel->leftButton->set_name("TouchPanel Quarto Lucas Botao Esquerdo");
    App.register_binary_sensor(touchpanel->powerButton);
    // Change for the name you want
    touchpanel->powerButton->set_name("TouchPanel Quarto Lucas Botao Energia");
    App.register_binary_sensor(touchpanel->rightButton);
    // Change for the name you want
    touchpanel->rightButton->set_name("TouchPanel Quarto Lucas Botao Direito");
    App.register_sensor(touchpanel->slider);
    // Change for the name you want
    touchpanel->slider->set_name("Touch Panel Quarto Lucas Slider");
    touchpanel->slider->set_force_update(false);
    return {touchpanel};
Check the comments in this file to change the required fields.
Now this will require us to add some C++ code (including the library I previous created). So let’s first download the wtc801 library files wtc801.h and wtc801.cpp and put in the same folder as the touchpanel.yml
And then create a touchpanel.h file that will hold our custom ESPHome component:
#include <esphome.h>
#include <functional>
#include "wtc801.h"

class TouchPanel : public PollingComponent {
 public:
  BinarySensor *leftButton = new BinarySensor();
  BinarySensor *powerButton = new BinarySensor();
  BinarySensor *rightButton = new BinarySensor();

  Sensor *slider = new Sensor();

  WTC801 *panel;

  // constructor
  TouchPanel() : PollingComponent(10) {
    panel = new WTC801(14, 13, 12, 15);
  }


  void onKeyEvent(KeyEvent event, uint8_t val) {
    switch (event) {
      case Slider:
        slider->publish_state(val);
        break;
      case KeyLeft:
        leftButton->publish_state(val);
        break;
      case KeyPower:
        powerButton->publish_state(val);
        break;
      case KeyRight:
        rightButton->publish_state(val);
        break;
    }
  }

  void setup() override {
    auto cb = std::bind(&TouchPanel::onKeyEvent, this, std::placeholders::_1, std::placeholders::_2);
    panel->setOnEvent(cb);
    panel->begin();
  }
  void update() override {
    panel->loop();
  }
};
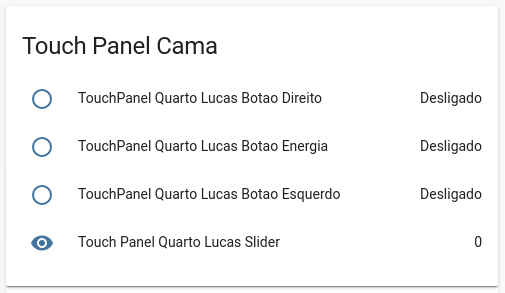
This will define 3 binary sensors for the buttons and one “Common” Sensor for the Slider. Their names are declared in touchpanel.yml lambda section.
After that we can build and upload our project using ESPHome:
esphome touchpanel.yaml run
If everything went correct, you should receive a notification in Home Assistant:
 Notification Badge
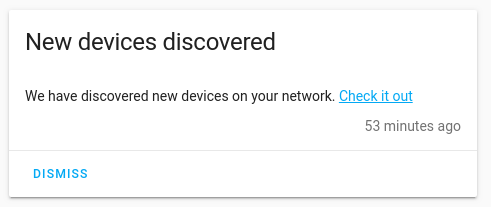 Home assistance showing that it discovered some devices
If we click in Check it out button, it will guide us to the Device Discovery & Configure page.
 Our device ready to be configured
Hit the Configure button and Home Assistant will start configuring your device. It will ask the API Password that you defined in touchpanel.yml .
After it configures, it will show in the device list:
 Our new device configured showing in the device list
Now we can configure the Automation to toggle the light using Home Automation
Click in the device line shown in the list. This will lead you another device list:
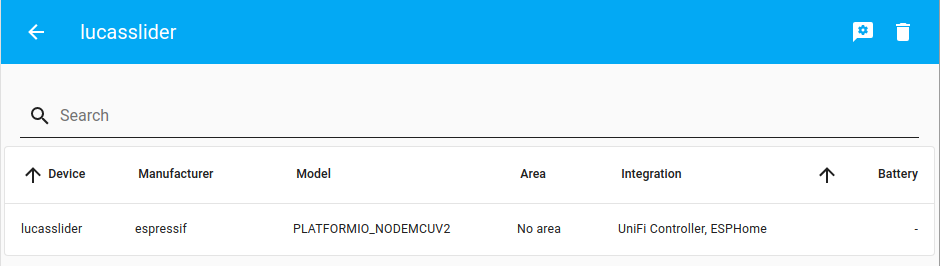 List of devices
Click in the device name at the list and it will lead you to the device info page.
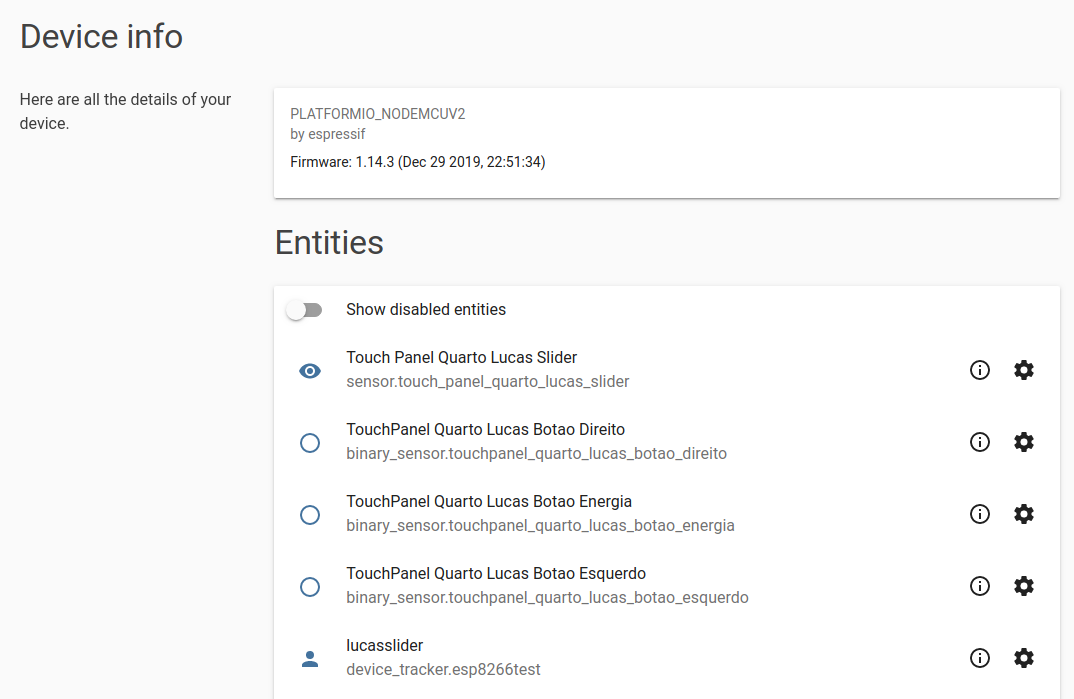 Device Info
In the end of the page, there is an automation section
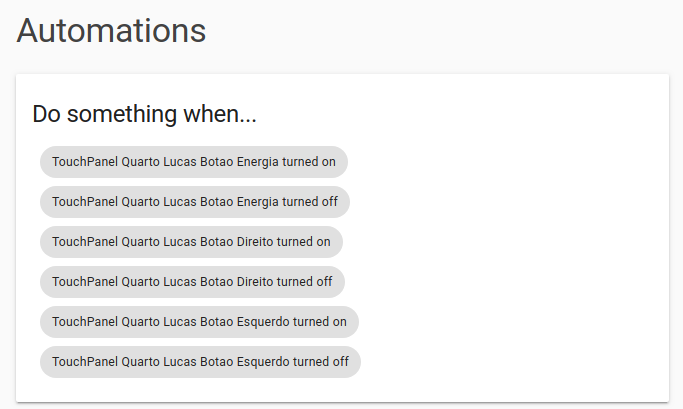 Automation Section
Click in any of turned on options and it will lead to the Automation Config Page.
Give a name to your automation, for example Toggle my light
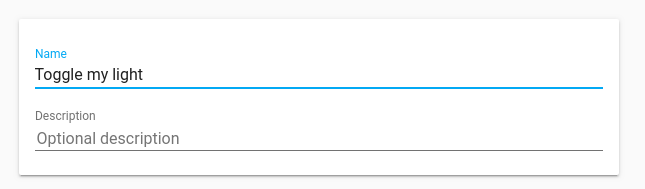 Name and Description of the Automation
In the Triggers section, make sure the correct trigger is selected
 Triggers Section showing this automation will be triggered when TouchPanel button is turned on
In Actions section select Call Service as Action Type , light.toggle as Service and add the following to Service Data
entity_id: light.name_of_your_light
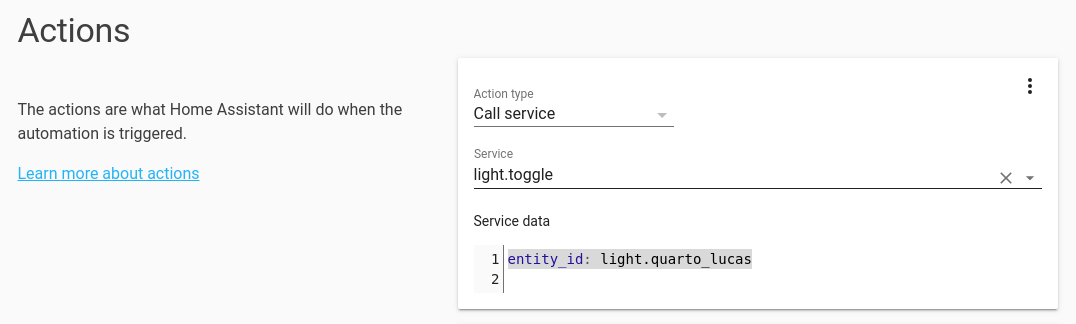 Configured action for toggling light in Home Assistant
Then hit the save button and test it.
 Save Button on the bottom-right side
Now the chinese touchpanel turns my room light on/off! - Agora o touchpanel chines desliga/liga luz do meu quarto! pic.twitter.com/78HeoG946z
— Cybernetic Lover (@lucasteske) December 30, 2019
Your house automation is done!
Home Assistant: https://www.home-assistant.io/
ESPHome: https://esphome.io/
Cite this article Plain text · BibTeX
Suggested citation
Lucas Teske. “Integrating Hacked Touch Panel into Home Assistant.” Lets Hack It, 2019. https://lucasteske.dev/2019/12/integrating-hacked-touch-panel-into-home-assistant/.
BibTeX
@misc{teske2019integratinghackedtouchpanelintohomea,
  author = {Lucas Teske},
  title = {Integrating Hacked Touch Panel into Home Assistant},
  year = {2019},
  publisher = {Lets Hack It},
  url = {https://lucasteske.dev/2019/12/integrating-hacked-touch-panel-into-home-assistant/}
}